In today's lesson I finally got to practice my Hybrid design. I am a bit under pressure as tomorrow is already our deadline but I keep having problems with the silicone and moulds I wasn't able to do it last week. But I can do it! Anyway when I did the sculptures for the cheek pieces I did two different sizes as I wasn't sure which one would fit better. I did the moulds in Uni and the bigger ones turned out really nice and smooth but the smaller one got some texture in it as the silicone didn't dry properly( again..haha I just want to cry..I didn't think the silicone and I are a good match :D )So I decided to use the smaller ,messed up ones for practice and if I would want to use the smaller ones I just make them again but I held the bigger cheek pieces against my models face and they looked quite nice so I was thinking going with the bigger ones. Again, when I did the forehead piece, even though the negative mould was really smooth , the actual piece had texture in it which I didn't want but again as it was for practice use only, I didn't mind that much even though it really annoys me that the silicone ,sometimes(everytime I really need it) just doesn't dry properly and I still haven't figured out why. I had all the silicone pieces ready for the practice and only got some food colouring and contact lenses.Everything else I needed was in the kit already.
I was a bit worried before I started the practice, not only because of the deadline pressure but also because I wasn't sure if the forehead piece would actually fit( even though I did measure her face) and if the overall character would actually look good in real life. Somehow I couldn't imagine how the pieces would look on her so that's why I felt slightly uneasy. Also I wanted a very red transparent shiny look on her decollete and shoulders using latex and food colouring but when I tried it at home the latex always reacts with the colour and starts crumbling into big chunks.. But I tried to apply the latex first and then afterwards the colour and it is a but better. I just have to be very careful when applying the colour.
For the hybrid look you need:
- silicone pieces
- pros aid
- pro clean
- cotton buds
- alcohol
- two bowls
- supercolor
- sponges
- bright blue contact lenses( in this case from Kryolan)
- latex
- red food colouring( also have some blue and green)
- blue fish net
- black top
- comb
- water spray
- hair gel
- hairdryer
- clips for holding the net at the back
- contact lens solution
- brushes
- towel
- baby powder
- Makeup wipes
- cleanser
- toner
- antibacterial Makeup spray
Steps:
- set up your work place and make sure you have all the tools and products you need
- clean models face-> only cleanse and tone
- ask model to put in contact lenses
- while she is putting in the contact lenses apply the Pros Aid to the silicone pieces ( there are 3->one big forehead piece and two cheek pieces)
- wait until it is almost dry and then also apply the Pros Aid onto the areas on her face where you will apply the silicone pieces
- when the glue is tacky and clear ,take the pieces and make sure before you apply them that the blending layer is not curled up
- stick on and press it down so it will stick properly, stretch out the blending layer and try to get no wrinkles->this makes it easier to blend it in
- when pieces are glued on,get another bowl with alcohol and cotton buds and start blending->take your time for it as you want seamless edges!
- when all 3 pieces are blended in clean up around them just in case there is some fluff or other leftover from the Baldiez layer->if the Baldiez layer or glue got into the hair just get a cotton pad and some ProClean and wipe it off
- when areas around pieces are clean get some baby powder and just brush some on to get rid off the stickiness
- when you are happy with the application take some pictures-> you need close up's for the hand in but also take some from different angles and mid-length shots
- now you can start painting
- get a sponge and use first supercolor number 10(red with an orangy undertone) and cover the whole face apart from the eyes->stipple it on apart from the eyes->please leave a big circle free
- after that you apply the number 11 on the outside of the face and also do some shading under the jawline ,the cheeks pieces, the forehead piece and under lips->but under lips only slightly
- then mix the 11(deeper red) and 6( black) to get a brownish red and contour the cheeks pieces even more->makes them stand out even more, apply also some on the forehead piece and around the hairline
- fill in the eyes with the light blue which is weirdly also number 10?-> this blue color is very similar to the blue of the contact lenses so it makes it look like big blue eyes->which is what we want
- blend the red and blue slightly together so there are now harsh lines around the eyes
- after you applied the paint make sure everything is blended very well->colours have to be smooth and edge less
- now brush the hair back and apply first some water spray to wet it down ->if the water spray is not enough get some hair gel and comb it through->we want a very sleek kind of slimy looking hair
- let the hair gel dry a bit before you apply the supercolor-> then apply the different red tones and a bit of orange into the hair line and take it down slightly, with that we create the effect that the forehead pieces kind of blends into the hair and we don't have abrupt harsh edges between hair line and silicone piece
- when you are happy with the hair and the overall face ask model to tuck down(or in) her t-shirt and bra straps so they are not visible anymore
- then cover the shirt with a towel->to protect the shirt as well to see until where you will apply the latex and food colouring
- first apply the latex; I find it is easier just to apply it with your fingers as it starts to immediately pick up when I try to apply it with a sponge
- when you covered the area you wanted let it completely dry and make sure nothing gets on it like hair or the towel
- when dry stipple on the red food colouring and create a shiny kind of transparent texture
- let it dry
- when everything is ready put the blue fishing net around her shirt and one arm->create trapped look
- take final images!
Before you start insert blue contact lenses
They already make a huge difference.
Looks a bit creepy ^^

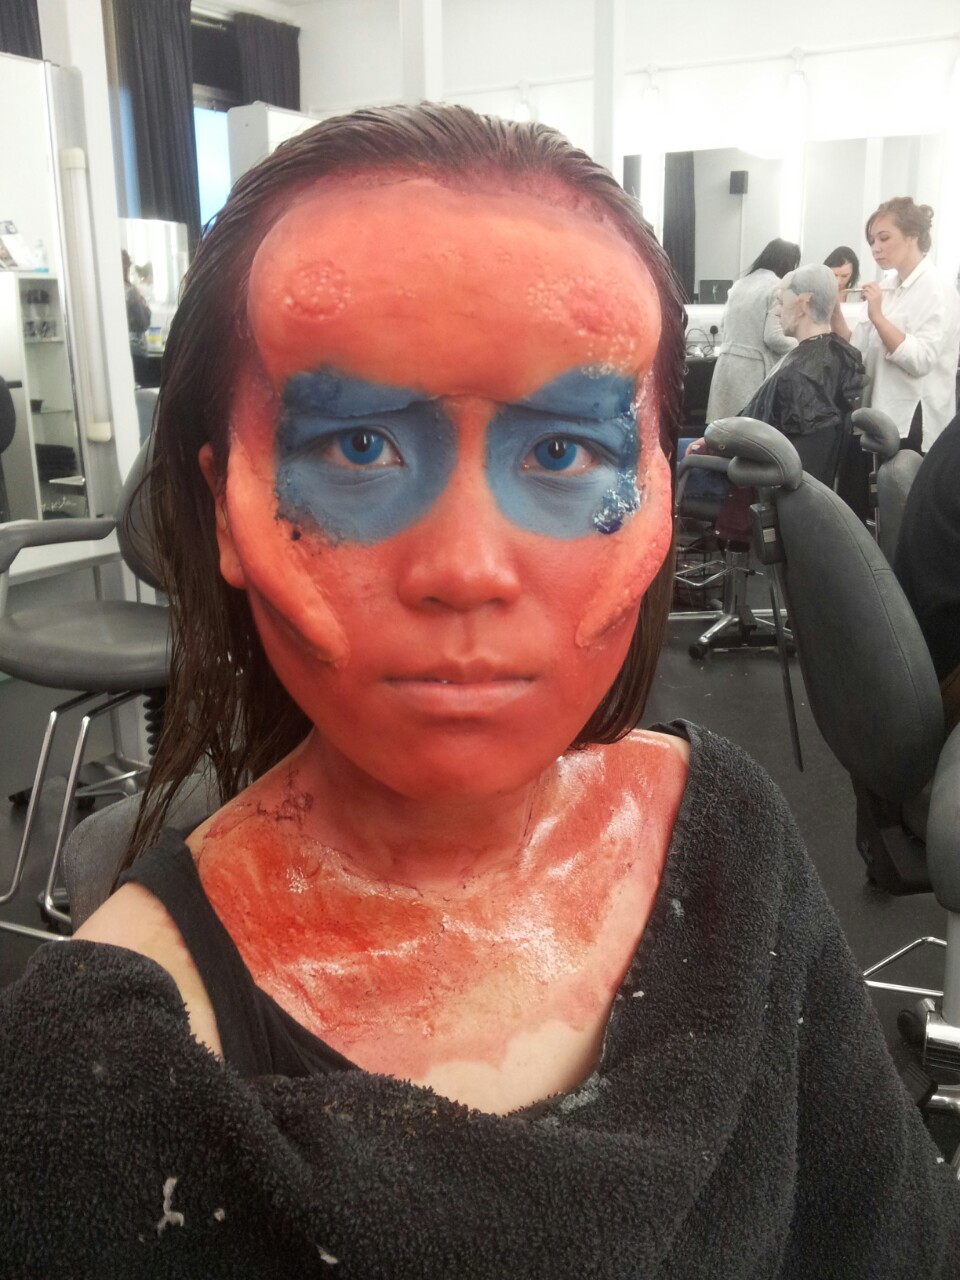
So that my model will be more comfortable while I apply the silicone pieces I told her to lie back and relax.
As you can see I applied the latex layer and food colouring already on the decollete which was a big mistake as the alcohol was running down her face dripping on it as I was blending the edges and I had to take it all off again. But I was bored while the glue was drying so I thought I could do the latex layer while waiting.But now I know I will definitely leave that part for the end.

The 3 silicone pieces are applied. But the forehead piece is definitely too big and I have to do the new smaller and flatter.

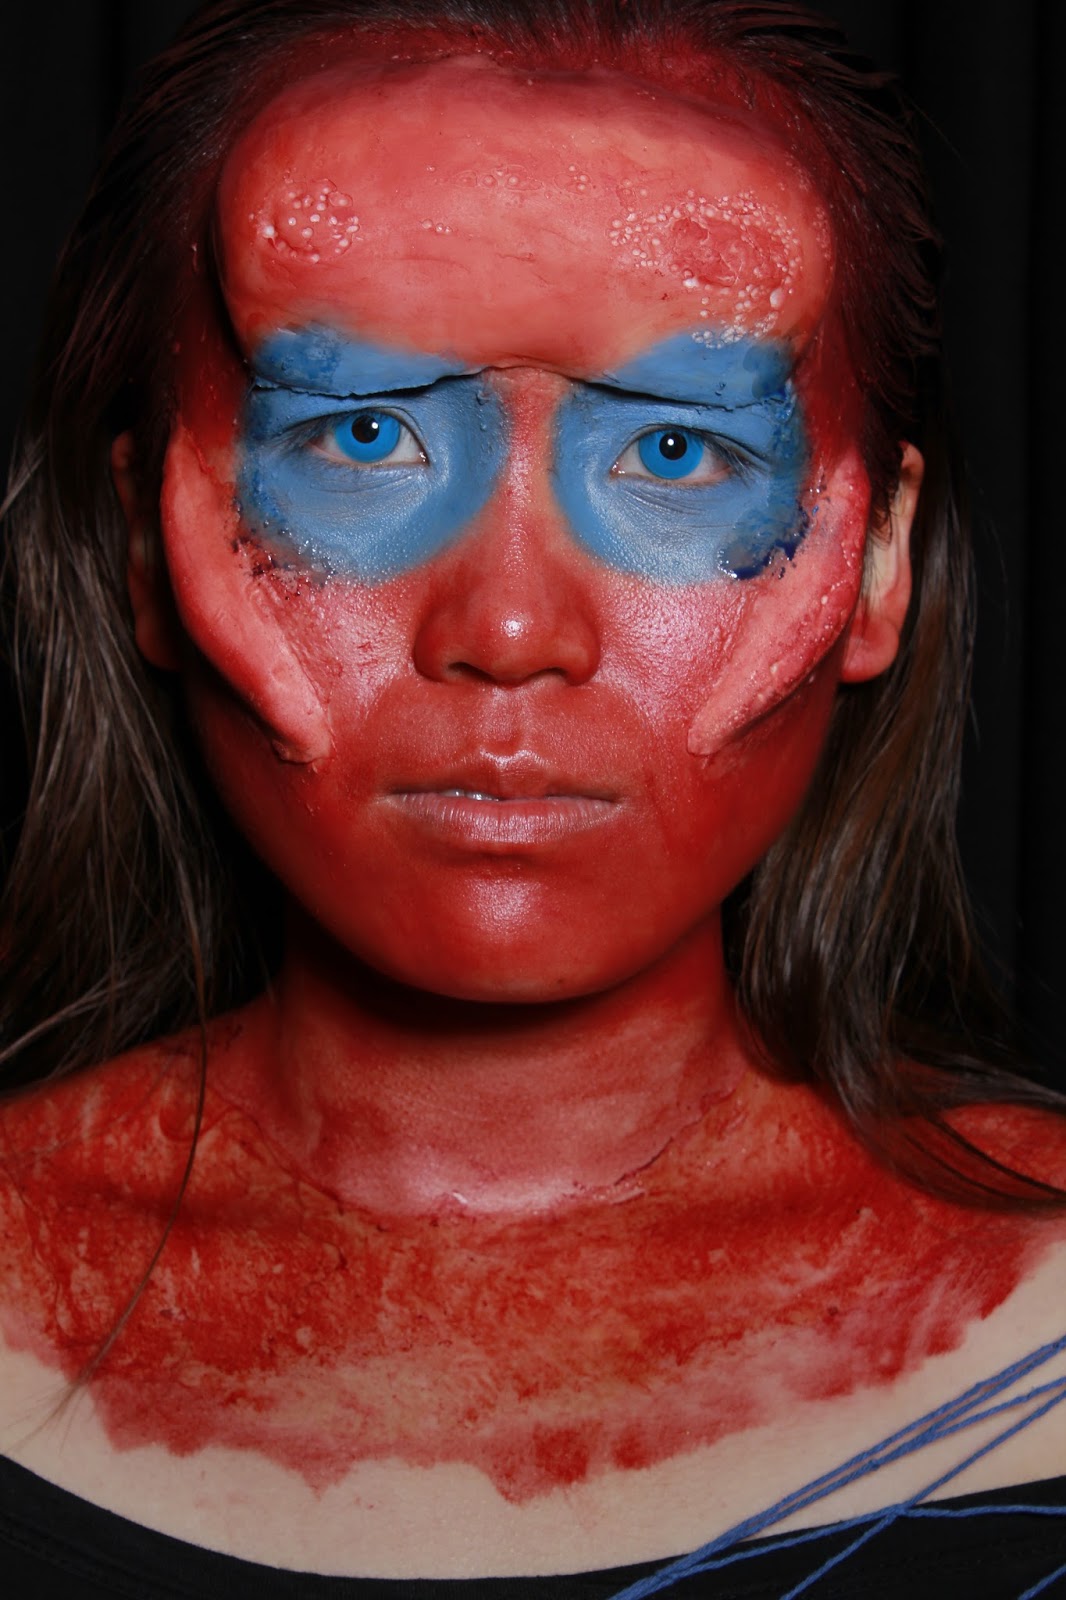
Done with applying the supercolor and doing the hair. The colour doesn't show up that much on the hair so for the actual thing I have to make the colour more intense.


And those pictures I took with an actual camera in the studio(the other pictures were taken with my phone)


Thoughts on the practice:
First off all I am quite relieved and happy with the practice outcome even though there are still things I have to change. But that is okay as you use practice to see what is working, what needs to be changed or further developed and how it actually looks. Even though I used the smaller cheek pieces and the forehead piece turned out way too big it was still very helpful to see how it would look like as I had my problems imagining it before. I knew how I wanted it to look like but I just couldn't imagine it on an actual person. But now I feel better. Also I will change the forehead piece. I will make the sculpture smaller and flatter and do a new mould , hopefully the silicone is cooperating with me:) .As for the cheek pieces I will use the bigger one as I think it will fit better with the forehead piece and they were much smoother. The thing that definitely wrong during the practice was the blending of the Baldiez layer. I think because the forehead piece was so big the blending layer just ripped off very easily . It ripped off right on the edge to the silicone which gave me now way to actually blend most of the sides but it also made the piece come off around the edges, which you can see very good especially around the eye area. But I already did like 5 layers of Baldiez because I knew it had to be a bit stringer so I didn't expect it to rip off so easily. So I was thinking to apply maybe one or two layers Baldiez after the silicone in the mould is dry , so that the silicone piece is covered in it from both sides and hopefully will last better. And I am honest after the blending layer ripped off and already looked stupid I wasn't really bothered to blend away the edges well. You can see it is quite messy, as well as the cheek parts. I know you should try to do your best even if it is just a practice. Otherwise I was quite happy how the colours turned out on the professional camera. They are more intense than on my phone. But I have to intense the red tones on the hair so it looks more blended in. As for the neck and decollete part I need to match the different red tones better. On the neck I still used the supercolor and on the decollete latex and food colouring. And you can clearly see the difference . I will experiment a bit more with those to see what works best. Otherwise I think if I blend better tomorrow and the blending layer is not ripping off it will look quite alright :)And I need to adjust her shirt and the fishing net for the actual shoot
No comments:
Post a Comment