Yes this will be a quite short post but I think it is important to note those things.
As I was running out of silicone and had general silicone problems(it wouldn't dry) I had to cancel my actual model to come down for my assessment. I also have to postpone my assessment because of that. And she hasn't got time on the day I am doing my assessment now so I will need to find a new model.
-> new model found.But I will have to redo my sculpture as her face shape is very different to my first model -.-'' Also my new model has long and very straight hair so I will need to change my hair design. I probably could still do a marcel wave but I know her hair and waves or curls usually don't stay in and I doubt I have the time to keep being troubled with her hair during my assessment. So I will just sleek back her hair and make is look wet and maybe a bit slimy.
Showing posts with label Technical Folder. Show all posts
Showing posts with label Technical Folder. Show all posts
Friday, 20 November 2015

Tuesday, 10 November 2015
Designing my hybrid
After deciding that the Vampire squid will be my other element I started thinking what key characteristics it has that I could use to mix with my human.
I did a drawing of the vampire squid with chalk just to get a better understanding myself how it is build and what colours to use.

And I thought I could definitely build in the red skin into my design. But it hasn't got just one red tone so I will have to mix an play around with colours. I think it is important to actually try and do it first to see if the design is actually working the way I want it. I also decided to use a silicone piece to make the forehead bigger, rounder and outstanding.The vampire had a quite big, smooth and round forehead so I think that would be a nice effect. But that means I will have to measure my models head first to get the exact measurements otherwise the silicone piece won't fit later. I will also get bright blue contact lenses to make the blue eyes more outstanding. The vampire squid has really huge blue eyes and I want to recreate them. Also i think it is inevitable to do that because otherwise her eyes will look to small because of the massive forehead piece. And I still want her face to look balanced. As for the rest of the body I thought I could start painting it in red and then see what else I could do. As for the her I was thinking to do a marcel wave as it could portray the movements of the water-> waves. My model already has short curly hair so I think it shouldn't be too difficult to do it.


-> it is really hard to draw it because I don't know how to bring in the dimensions from the silicone pieces if it shows the front of the face^^ So now it looks more like an alien^^
I just did a drawing of what I think my hybrid could look like and I also decided to do silicone pieces for the cheeks which will enhance the cheek area. If I only do the forehead piece I think it would look too massive and unbalanced. I also was thinking to flatten the nose but I will have to see if I have enough time to do all of that. What I will also do is that the colour will get darker and more intense going outwards the face.
Cheek pieces
-> I did two different sizes to see which one is working better
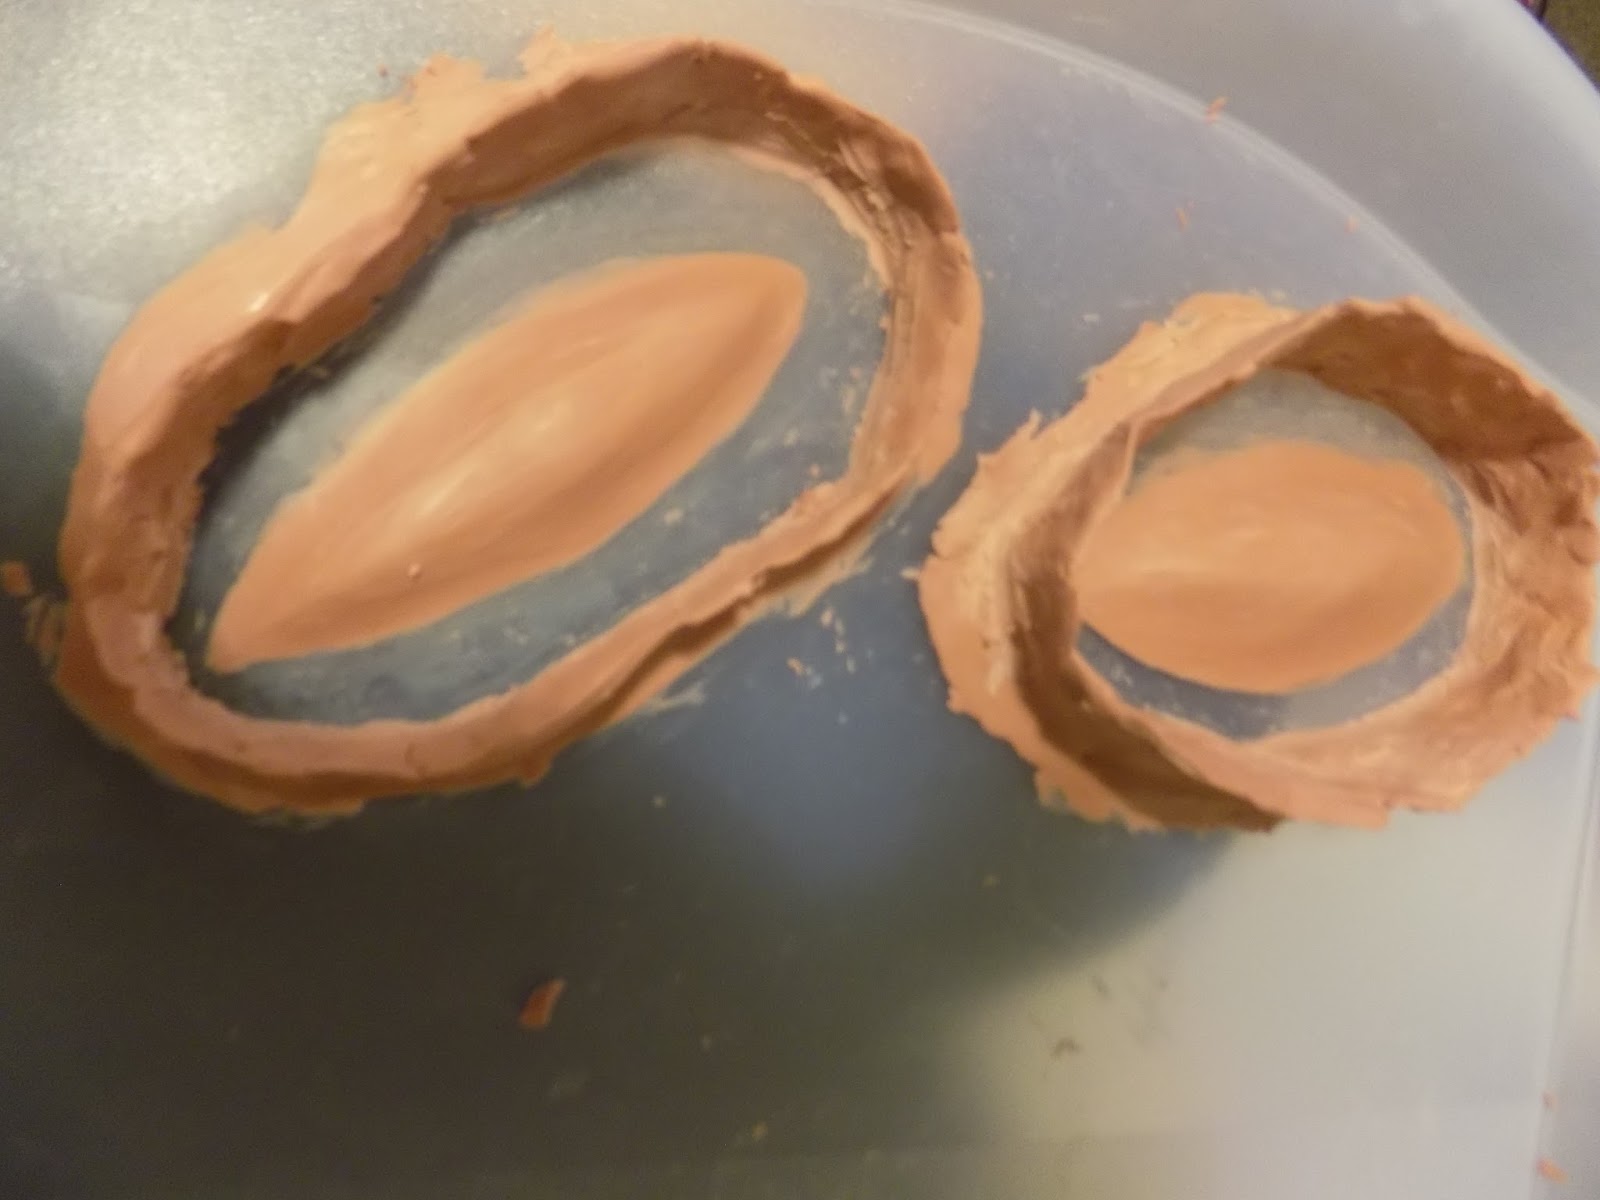

Forehead piece
I ask my model to measure her forehead and her measurements were 17x8cm ( she has a massive forehead!!^^)


It took quite long to do the forehead piece as you need to build up the height. But what else is there to do when you can't sleep at 2 am. Just do sculptures^^. To get the slight curve around the eye area I actually put some cling film on my face and applied heated up clay onto it to get kind of the shape I needed. Also I wanted to see how it would look like. I did look a bit weird but well we will see:) But otherwise I quite enjoyed doing the sculptures, It is something very relaxing to do still you have to focus.It's nice. But the thing that took me the longest was to create the walls with clay for the silicone. That's absolutely no fun.
I was just thinking a bit more about the clothes I want my hybrid to wear and because I want to show a lot of skin I will ask my model to wear a black bandeau top. I also need to see what I will do with the colour of her hair. As she keeps dyeing her hair in various colours at the moment I may need to cover them over with a coloured spray or supercolor
Saturday, 7 November 2015
What is a hybrid?
A hybrid is something that consist of at least two different elements. We know hybrids especially from the flora and fauna.
I found these definitions on dictionary.com and they explain the word hybrid( when it comes to flora and fauna) quite well.
( dictionary.com)1.
the offspring of two animals or plants of different breeds, varieties,species, or genera, especially as produced through human manipulation for specific genetic characteristics.2.
a person or group of persons produced by the interaction or crossbreeding of two unlike cultures, traditions, etc.
Hybrids between different species tend to be sterile.
But a lot of people also think about cars when they hear the word hybrid. A hybrid car is being powered by an internal combustion engine(diesel, petrol) and an electronic motor. But now there are more than just hybrid cars. You can find this kind of combination also in ships, aircraft's and trains.
Some well known hybrid cars are:
the BMW i3 hatchback,

(source)
Volkswagen Golf hatchback

(source)
or the Toyota Prius hybrid hatchback.

(source)
But now more to hybrids in fauna in flora.
When it comes to hybrids in biology we distinguish between different types of hybrids.
There are the :
- structural hybrids
- permanent hybrids
- genetic hybrids
- numerical hybrids
But we can also differentiate between inter specific hybrids( hybrids between different species with same genus->lions,tiger), intra- specific hybrids (hybrids between subspecies within one species-> Siberian Tiger, Bengal Tiger), inter generic hybrids (hybrids between different genera, for instance sheep or goat), inter familial hybrids( are extremely rare and an example are gamebird hybrids -> these are a mixture between domestic poultry and different game birds (ex. ducks, goose)
Animal Hybrids
"Liger" / "Tigon" (depends on the species the father and mother was from-> for Ligers the father was a Lion and mother Tiger) -> Lion/Tiger

(source)
"Mule" -> Horse/Donkey

( source)
"Cama" -> Llama/ Camel

(source)
"Gamebird Hybrid"
"Blood Parrot" -> Midas Cichlid / Readhead Cichlid

(source)
"Killer Bees" -> African Bee/ European Honey Bee

"Carball" -> Ball Python / Carpet Python
"Grizzly- Polar Bear Hybrid"

(source)
"Savannah Cat" -> Domestic Cat/ medium- sized wild African Cat


"Sheep-Goats"
"Zebroids"
Plant Hybrids
"Grapefruit" ->Pomelo/ Orange
"Peppermint" -> Spearmint/ Water mint
"× Fatshedera lizei" -> Hedera helix / Fatsia japonica
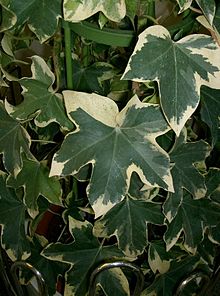
"Leyland cypress(× Cupressocyparis leylandii)" ->Monterey cypress/ Nootka cypress
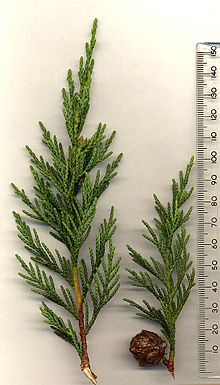
"Rose Hybrids" -> different coloured roses combined

(source)
"Hybrid Tea Rose"

(source)
"Pansies Hybrids" -> same concept as with roses

(source)
Wednesday, 28 October 2015
Bald Cap Application
Materials needed:
- bald cap
- water spray
- hair gel
- spirit gum
- spirit gum remover
- alcohol
- super Baldiez
- pin tail comb
- hair gribs
- supercolor
- foundation
- towel or cape to cover your model
- stipple sponge
- wet wipes
- coach roll
- baby buds
- aquacolor
- fullers earth
- colored spray for body and hair
Pre-Impression Bald cap
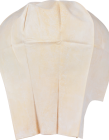
Latex Bald cap
Both can be found at Kryolan
some general notes:
- using super baldiez thin down with alcohol
- baldiez ->use acetone
- rubber bald caps- you can smooth out edges with latex
- watermelon bald caps-> use super baldiez and blend with alcohol
- you can wear wigs over bald caps-> for example of you do thinning hair
- buy some cheap bald caps for practice
- make sure to have spare ones when using it for assessment (or somewhere else) just in case something goes wrong
Application- Steps:
- make sure you set up your work space
- cover model with towels
- clean models face
- don't apply moisturizer on areas where you will stick the bald cap on, only use toner there
- wet hair down a bit and brush through
- use strong hair gel or water spray to flat down the hair -> it is very important that the hair is flat otherwise the head will look bumpy later
- get hair as near to being head shaped as possible->should look natural later
- when you try to flatten long hair(everything longer than shoulder length), apply the gel(a lot of it) first and comb through-> divide hair in the middle and wrap it around head but make sure it is flat so it isn't noticeable through the bald cap
- for shorter hair gel it all to one side
- get all the hair off the face
- have always tissues or wet wipes by your side so your can wipe and clean your hands
- can't use any pins or gribs
- use soap or wax for baby hair
- put the bald cap over the top of the head-> ask model to help and hold the hair down while you pull the cap over
- the long side of bald cap goes in the back
- don't cut anything off until you have positioned the bald cap accurately and are happy with how it looks
- when cutting around face, place your fingers between skin and scissors to make sure you are not harming them
- carefully use pin tail comb to put any hair back that come off-> don't damage the bald cap! be careful!
- then pull cap down the neck
- cut off any excess until your are under ear height->cut around the ear but not in a round shape

cut it out like this
- ask model to stretch their neck/head forwards and cut the bit at the neck off
- don't stretch it don't too much when you cut otherwise it can happen that the cap will be too short afterwards
- peel back front of bald cap
- when applying the glue tell model to tilt the head back slightly and she should have her eyes closed at all times when applying glue and later when blending with acetone( or alcohol)´
- apply the spirit gum and wait until it is tacky
- apply also spirit gum on skin where the cap will be
- pull the front bit back over and press it down with a damp piece of coach roll ( can also use an old powder puff or damp towel to press it down
- make sure to get rid off any air bubbles
- glued on parts become see-through-> edges start to disappear
- finish glueing on the rest of the bald cap
- blend pre-impression bald caps with acetone and baby buds-> models eyes must be closed
- any bagging around neck area is normal if the bald cap isn't custom made for the model
Colouring- Steps:
- get your supercolor palette and a sponge
- use a mixture of red and pink to cancel out the dark tones of the hair
- now go over with foundation ( or other colours depending on what your are doing)
- match skin tone to foundation and stipple over the rosy covered head
- powder
- could also use fullers earth depending on your design-> when using it:it gives a dry cakey look or like mud, mix fullers earth powder with water in a bowl and apply it straight onto the head, skin(wherever you need it)->don't put fullers earth into the sink/drain->it can block it,
- you could use fullers earth as face mask as it is like the clay mask you can get in any drugstore
- use a hair dryer to get it to dry more quickly
- create textures using an Afro comb(just an example)
- you can add aquacolor over it or even spray colored spray onto it( for example make it golden)
I really would have liked to practice with the bald cap as well but unfortunately I am a bit short off money at the moment. But I will get one just before I go home over Christmas and practice on my sister. This lesson was very interesting and it was amazing to see the others working with bald caps and see the transformation of their models.
Sunday, 18 October 2015
Scar Research
For my scar I choose to do one after an ACL surgery. As told in the background story my character suffered from a torn cruciate ligament and meniscus. As the anterior cruciate ligament was torn it needed surgery. So of course I will look into the surgery procedures deeply to understand what is actually happening even though I kind of know as I waited for my sister when she had her surgeries. But because this blog is not in German it was even more important to do proper research on it so I can explain in properly. But it is not only important to know what happens during the surgery you also need to know the anatomy of the knee as the scar needs to be placed right at the end. Also knowing the anatomy it will also helps understand what parts will move later which is important should the scar be for something other than doing a photoshoot where the model sits still. You need to know how movement will affect your application.
Anatomy of the knee
I found some good images which portray the knees anatomy quite well.


I will also take these images with me when doing the assessment as it is good for referencing.
On this website you can play around and see the different layers from 360°. It is very interesting as you normally can't see it. Also it shows all the different layers. Just bones, the connective tissues, deep muscles, muscles and at last with skin over it.


The knee joint consists of Femur(thigh bone), patella, Tibia(shin bone) and fibula. The lateral and medial collateral ligaments connect the femur with the fibula and tibia. On the tibia you can find the lateral and medial meniscus. Inside of the joint are the anterior and posterior cruciate ligament which keeps the joints in place and prevents overbending or overtwisting. But in some extreme cases( sports, motorbike accidents,etc) those ligaments can tear apart. In comparison with tendons the cruciate ligaments are not able to regenerate themselves and that's why surgery is necessary.
I found some good videos which explain the procedure but I will also explain it myself. On of the videos is a live surgery video so please be warned. Just in case you are not comfortable with those kind of things. I found kind of cool^^
After the injury happened you will have a very swollen knee it it could also happen that there is a concentration of blood inside. Which will have to be absorbed right away. You will also notice a decrease on motion and will definitely be in a lot of pain. Before surgery can be done the doctors have to wait for the swelling to go down. I also read that you should do physiotherapy until you have your surgery but when I think about how much my sister was in pain and couldn't properly walk I doubt that it is possible or comfortable for the patient. When it is finally the day of surgery the surgeon will first do a arthroscopy to see what exactly is damaged, how severe the damage is and to inspect the rest of the joint as well. At this point it will also be decided from where the new tissue will be taken. There are different types ans also the tissue can come from your own body ,which is the called autograft or you can get some from a donor ,which is called allograft. There is also synthetic graft. This is mostly use for mass ligament replacements or if you don't have access to an allograft or autograft. Commonly the tissue that is taken is a strip of your patellar tendon, part of hamstring tendons or part of quadriceps tendon.
Patellar tendon: part which is running from the bottom of your patella to the top of the tibia
Hamstring tendons:run from back of the knee on the inner side all the way up to your thigh
Quadriceps tendon: attaches patella to quadriceps muscle-> this is the large muscle on the front of the thigh.
After the surgeon know what the situation is you will be prepared for the surgery or more commonly now is that they do right after the arthroscopy as you are under anesthetics already anyway and it saves you from having multiple surgeries.
What is an arthroscopy?
It is a keyhole surgery. The arthroscope is a flexible tube that acts as camera and light source. The image from inside will then be shown on a monitor so the surgeon can see everything clearly. There will be some other some cuts on the sides of the knee as well for other medical instruments and a tube which will absorb blood and wound fluids. When staying longer in the hospital after a surgery on knee or leg you will have the tube for blood and wound fluids inside you for a a day or two and will be then be pulled out which can be painful and the skin around already started healing. But it is important that no fluids(blood,wound fluids) are just freely being inside you .But as those kind of surgeries are now also done in outpatient departments where the patient can leave around an hour after surgery you don't have this tube in you for days anymore.First the torn fibers of the anterior cruciate ligament are being removed and the new tissue which is most commonly taken from the hamstring tendons will be prepared. The new tissue is then fixed to some string and some kind of anchor which will secure it into the femur. There will also be a screw for fixating the other and in the tibia bone. Now the surgeon will drill a hole into the femur right through the tibia so the new tissue can be placed where the original cruicate ligament would have been.
I have made some screenshots of one of the videos for better understanding.
Here you see that above the knee joint the arthroscope is being inserted and two more cuts are being made for other medical instruments and the tube for absorbing wound fluids and blood

The next two show how the drill is making a tunnel through the femur and tibia for inserting the new tissue.


New tissue either from hamstring tendons or patellar tendon is being attached to a flexible string.

Tissue is being pulled through tunnel between the joints where the original cruciate ligaments would be.

Anchor that secures it in the femur.

And a screw for securing in the tibia. The bone will heal around it and accepts it as its own part.

After some time new cruciate ligaments will grow around the new tissue forming a new anterior cruciate ligament.

Also when taking new tissue from the hamstring tendons the surgeons tend to take more as needed to make sure they have enough but also as the hamstring tendon is able to reproduce new tissue from time to time.
After the surgery you will be walking in crutches for at least 3 weeks. Many also become a knee cast to keep your knee stable . I know my sister even had a wheelchair for the first days as she was in a lot of pain. Just a few days after surgery you will immediately start with physiotherapy to help your muscles build up again so your muscles can secure your knee joint and keep the ligaments stable.
I think the time of recovery is different for each individual as everyone has a different healing ability.
In my sisters case it took month until she felt secure enough to walk without the cast and one time her ligaments teared apart while having physiotherapy so you should be careful and how should I say it listen to your body. Of course a physiotherapist knows what he is doing, or at least should, but you know your body best and if you feel uncomfortable or think it is too much pressure on the knee you should stop.
Some other very common knee injuries are:
Fractures
Dislocation (hmm, tell me about it-.-')
Posterior cruciate ligament injuries
Collateral ligament injuries
Torn meniscus
Torn tendons
Tuesday, 13 October 2015
Materials essential for sculpting and making moulds and where to get them from
Most of the materials you will need you can get from Neill's Materials. As for the fixing spray you can order it from Kryolan. If you need a glue gun but you don't have one at home I would suggest to go to a crafts shop or order it from Amazon or Ebay. That's what I did. Same applies for the scale. I just bought a cheap one from Ebay.
You will need:
Fixing spray
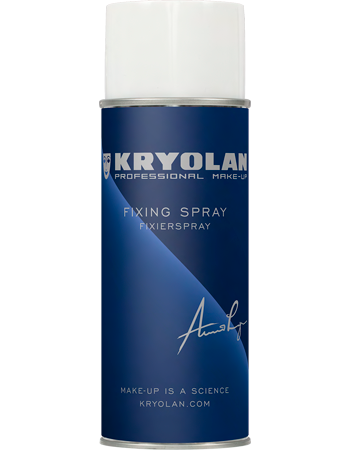
There are also smaller bottles, but it really depends on what you are doing but for the beginning I think one of the smaller ones is sufficient as well
Silicone (Platsil Gel 25- Silicone A and B)

Mixing Cups

Wooden Mixing Sticks

Petrolease

Gloves

When working with Silicone make sure that you get the right gloves. Cheap ones may not work well together with the Silicone
Clay

Super Baldiez

Silicone Pigments

Deadener

Pros- Aide

Pros- Aide Remover- Pro-Clean

I don't know if I can say this here^^(well it's my blog after all :D) but normal cleansing oil from a drugstore does the same thing as the Pro-clean and is way cheaper!
Naphtha

Flesh Palette ( alcohol based colours)
I couldn't find the one we had in our kit but they still have similar ones on their website


Wooden Brushes

they are currently not on the website as well
Sculpting Tools


currently not available on website
Mask to cover your mouth when using Fixing spray and Petrolease

You can get them probably online but you can also go to your local chemist/pharmacy and buy them there
Plastic Tray

I got this big plastic tray for 1£ from Ikea and it is really good for sculpting for my final hybrid design as the sculptures are a bit bigger
Scale

Glue Gun

Cling Film

Alcohol

Cotton Buds

Baby Powder

Cotton Pads

Baby Wipes

In addition you can get /use
Puss
Blood

Super Color
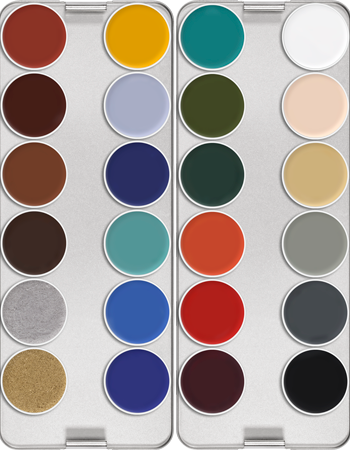
Aqua Color
Subscribe to:
Posts (Atom)